Category: Uncategorized

Starting a Community Garden: Bringing People Together through Nature

1 Comment

In today’s fast-paced world, where urbanization and concrete jungles seem to be the norm, the idea of a community garden might seem like a breath of fresh air. A community garden is a shared space where people come together to grow fruits, vegetables, herbs, and even flowers, fostering a sense of community, sustainability, and environmental stewardship. If you’re someone who values the importance of fresh produce, local food sources, and the therapeutic benefits of gardening, starting a community garden might be the perfect project for you. Check out these awesome related posts on composting food scraps unleashing nature’s magic: the incredible benefits of composting food scraps and reducing waste and upcycled crafts the ultimate guide to upcycled crafts for adults: unleash your creativity and sustainability for more eco-friendly tips.

Why Start a Community Garden?

Starting a community garden offers numerous benefits, both for the individuals involved and for the community as a whole. Here are some compelling reasons to consider this endeavor:

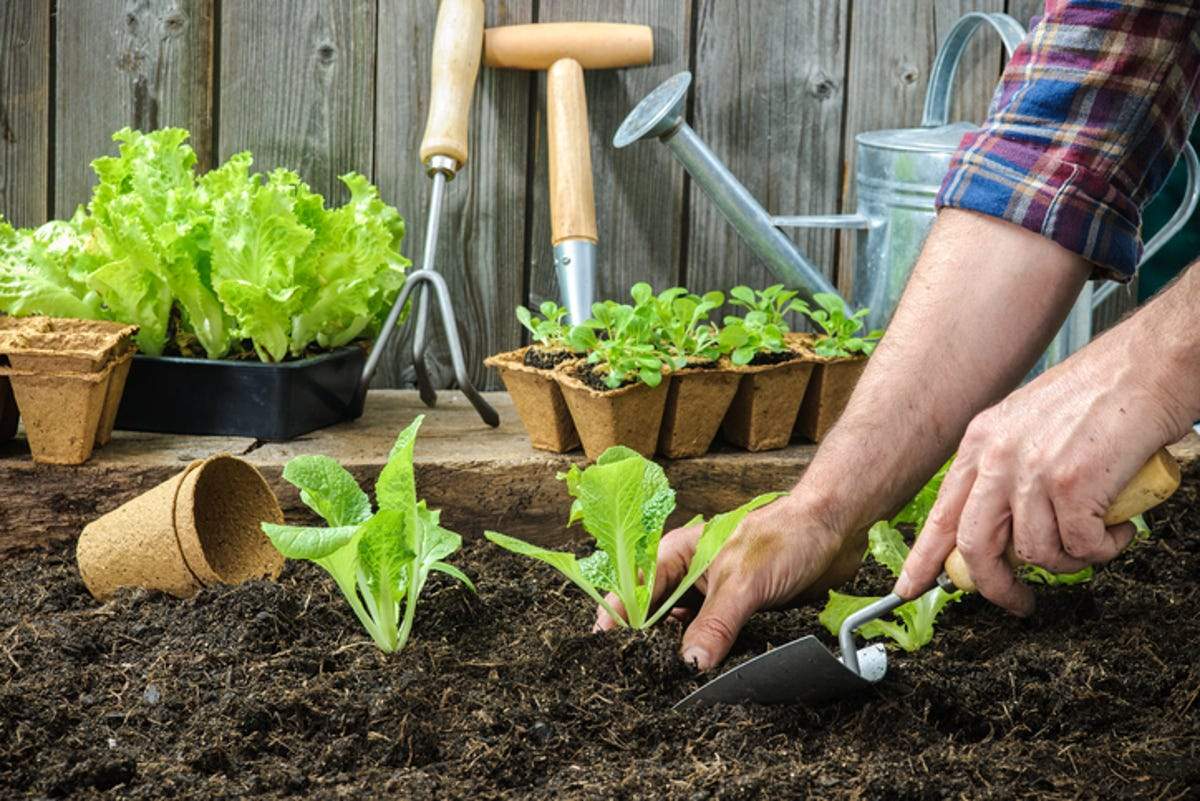
  1. Access to Fresh, Locally-Grown Produce: By growing your own fruits and vegetables, you’ll have access to nutritious, locally-sourced produce that’s free from harmful pesticides and synthetic fertilizers.

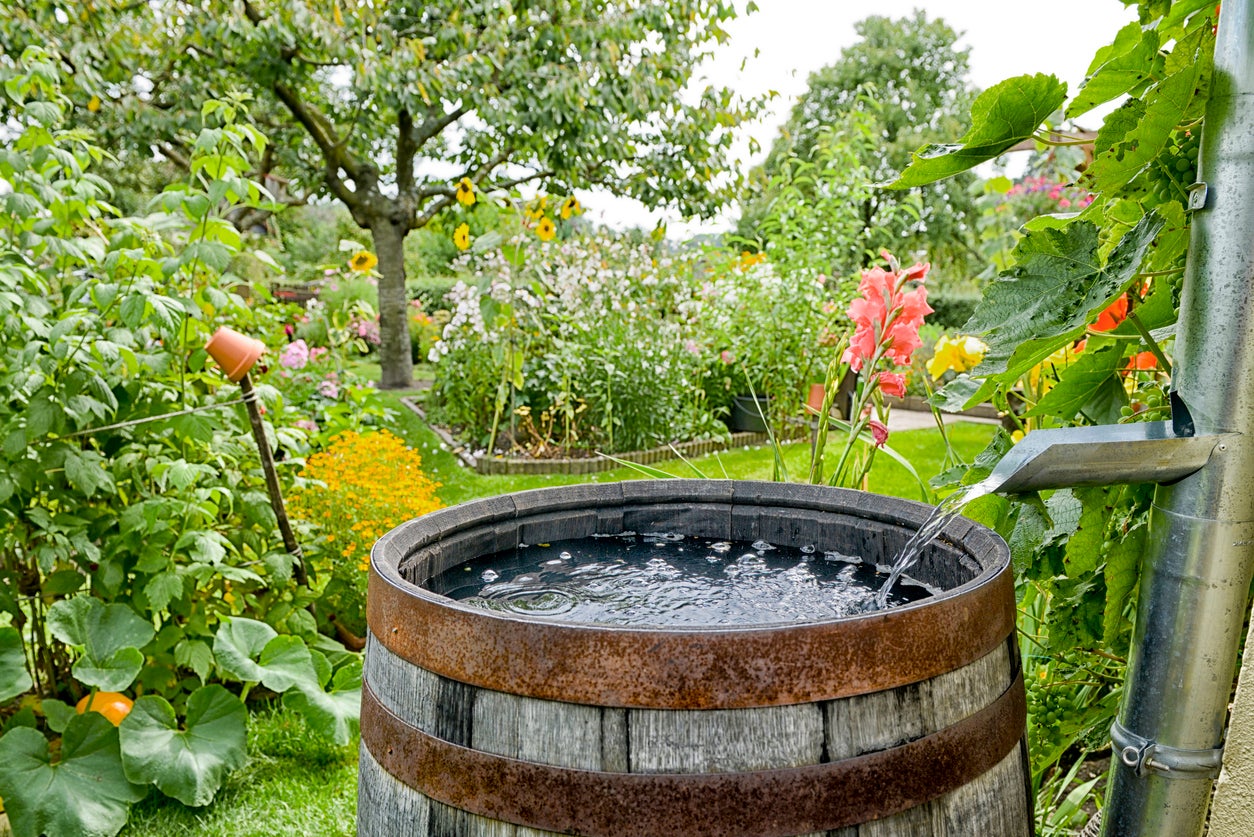
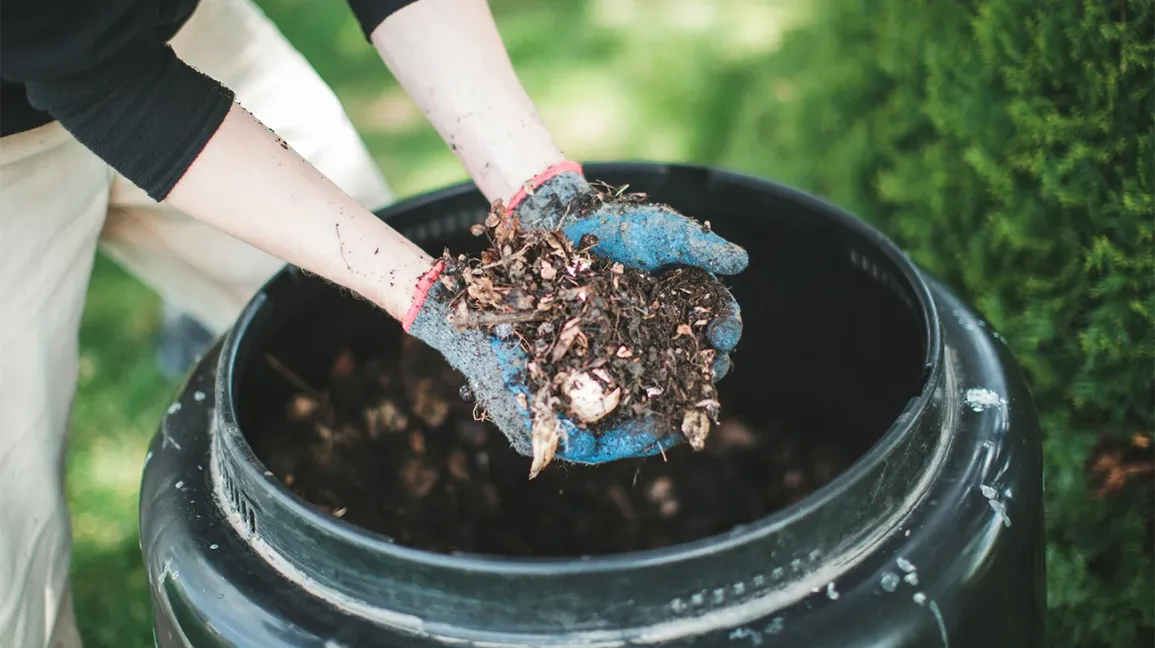
  2. Promoting Environmental Sustainability: Community gardens are a prime example of sustainable living. They reduce the carbon footprint associated with transporting produce over long distances, and they encourage eco-friendly practices like composting and water conservation. Check out reducing your water footprint: simple steps for a more sustainable home for water-saving tips.

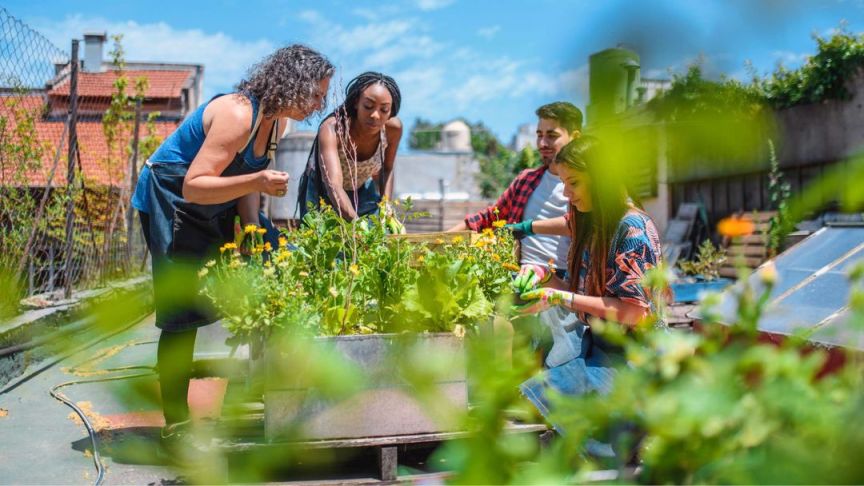
  3. Building Community Connections: A community garden provides a shared space for people from diverse backgrounds to come together, interact, and form connections. It fosters a sense of belonging and creates opportunities for social interactions and intergenerational learning.

  4. Improving Mental and Physical Health: Gardening is a therapeutic activity that can alleviate stress, improve mood, and promote physical exercise. Being surrounded by nature and engaging in outdoor activities has numerous mental and physical health benefits.

  5. Educational Opportunities: Community gardens can serve as outdoor classrooms, teaching children and adults about the importance of sustainable food production, environmental conservation, and healthy eating habits.

Read Also: The Devastating Effects of Deforestation on Climate Change

Steps to Start a Community Garden

Starting a community garden requires careful planning, organization, and collaboration. Here are the essential steps to get your project off the ground:

  1. Form a Planning Committee: Assemble a group of dedicated individuals who share your vision for a community garden. This committee will be responsible for coordinating efforts, delegating tasks, and making important decisions.

  2. Identify a Suitable Location: Look for an available space that receives ample sunlight, has access to water, and is easily accessible to community members. Consider vacant lots, parks, or church grounds. Ensure you have the necessary permissions and approvals from the landowner or relevant authorities.

  3. Develop a Plan and Secure Funding: Create a detailed plan that outlines the garden’s layout, planting areas, infrastructure needs (e.g., raised beds, fencing, tool sheds), and projected costs. Explore funding sources such as grants, donations, or community partnerships.

  4. Recruit Volunteers and Assign Roles: Engage community members and recruit volunteers to assist with various tasks, such as planning, gardening, maintenance, and organization. Assign roles and responsibilities to ensure efficient operation.

  5. Prepare the Site: Once you’ve secured the location and necessary approvals, begin preparing the site. This may involve clearing the area, building raised beds, installing irrigation systems, and creating pathways.

  6. Establish Guidelines and Rules: Develop a set of guidelines and rules to ensure the smooth operation of the community garden. These may include plot assignments, maintenance responsibilities, and policies for shared resources.

  7. Organize Educational and Social Events: Plan workshops, classes, and social events to promote community engagement, share gardening knowledge, and foster a sense of camaraderie among participants.

  8. Promote and Celebrate: Spread the word about your community garden through various channels, such as social media, local news outlets, and community events. Celebrate milestones and successes to maintain enthusiasm and attract new participants.

Read Also: Endangered Species in North America: A Race Against Time

Comparison: Community Garden vs. Private Garden

While both community gardens and private gardens offer opportunities for growing fresh produce, there are distinct differences between the two:

Aspect Community Garden Private Garden
Land Ownership Shared public or communal space Privately owned land
Gardening Style Collaborative effort Individual effort
Resource Sharing Resources (tools, water, etc.) are shared Resources are privately owned
Social Aspect Fosters community connections Primarily a solitary activity
Educational Opportunities Provides opportunities for collective learning Learning occurs individually
Costs Shared costs and resources Individual costs and resources
Crop Variety Diverse crops based on collective interests Crops based on individual preferences

While private gardens offer the convenience of individual control and privacy, community gardens foster a sense of community, promote resource sharing, and provide educational opportunities for all participants.

Best Practices for Successful Community Gardening

To ensure the long-term success of your community garden, consider these best practices:

  1. Establish Clear Communication Channels: Maintain open and transparent communication among all stakeholders, including volunteers, community members, and local authorities. Regular meetings, email updates, or a dedicated online platform can facilitate effective communication.

  2. Encourage Collective Decision-Making: Involve community members in the decision-making process, fostering a sense of ownership and shared responsibility.

  3. Implement Sustainable Practices: Incorporate eco-friendly practices such as composting, rainwater harvesting, and integrated pest management to promote environmental sustainability.

  4. Foster a Welcoming and Inclusive Environment: Embrace diversity and create an inclusive space where people of all ages, backgrounds, and abilities feel welcome and valued.

  5. Provide Ongoing Education and Training: Offer workshops, demonstrations, and educational resources to help community members develop gardening skills and learn about sustainable practices.

  6. Develop Partnerships and Collaborations: Explore partnerships with local organizations, schools, businesses, or community groups to expand resources, funding opportunities, and community engagement.

  7. Celebrate Successes and Milestones: Recognize and celebrate the achievements and contributions of volunteers and community members. This can help maintain motivation and encourage continued participation.

Read Also: Unleashing Nature’s Magic: The Incredible Benefits of Composting Food Scraps and Reducing Waste

Starting a community garden is a rewarding endeavor that brings people together, promotes sustainable living, and fosters a deeper connection with nature. By following these steps and best practices, you can create a thriving community garden that serves as a hub for education, environmental stewardship, and community building. So, roll up your sleeves, gather your neighbors, and start planting the seeds of a greener, more connected community today!

Categories: Uncategorized

Building a Rain Barrel for Home Use: A Sustainable Solution

No Comments

In an era where environmental consciousness is paramount, embracing sustainable practices has become more crucial than ever. One such practice that has gained popularity among eco-conscious individuals is the use of rain barrels. By harvesting rainwater, these ingenious systems not only reduce water consumption but also contribute to a greener future. In this comprehensive guide, we’ll explore the benefits of building a rain barrel for home use, the necessary materials, and the step-by-step process to create your own.

Why Build a Rain Barrel?

  • Water Conservation: Rain barrels help capture and store rainwater that would otherwise go down the drain, reducing the strain on municipal water supplies.
  • Cost Savings: By utilizing collected rainwater for activities like gardening, car washing, and even flushing toilets, you can significantly lower your water bills.
  • Environmental Friendly: Rainwater harvesting reduces the demand for treated water, lessening the energy required for water treatment and distribution.
  • Sustainable Gardening: Rainwater is naturally soft and free from chemicals, making it an ideal choice for watering plants and maintaining a healthy garden.

Read AlsoThe Best Zero Waste Grocery Stores Near You: A Comprehensive Guide and Comparison

Materials Needed

  • A large plastic barrel or container (food-grade is recommended)
  • A fine mesh screen or gutter guard
  • Overflow pipe and fittings
  • Spigot or valve for water release
  • Caulk or sealant
  • Drill with appropriate bits
  • Saw or utility knife (for cutting holes in the barrel)
  • Downspout diverter or rain barrel diverter kit (optional)

Read AlsoThe Best Eco-Friendly Cleaning Products for Sensitive Skin: A Comprehensive Guide

Step-by-Step Guide

  1. Choose the Right Barrel: Look for a sturdy, food-grade plastic barrel with a capacity of 50-100 gallons. Repurposed barrels from food or beverage industries are ideal choices.

  2. Clean and Prepare the Barrel: Thoroughly clean the barrel with a mild soap solution and rinse it well to remove any residues or contaminants.

  3. Cut the Openings: Using a saw or utility knife, carefully cut the openings for the downspout diverter or rain barrel diverter kit (if using one), the overflow pipe, and the spigot or valve.

  4. Install the Mesh Screen: Cut a fine mesh screen or gutter guard slightly larger than the top opening of the barrel. Secure it in place using caulk or sealant to prevent debris and insects from entering the barrel.

  5. Attach the Overflow Pipe: Install the overflow pipe near the top of the barrel, angled downwards to direct excess water away from the foundation of your home.

  6. Install the Spigot or Valve: Drill a hole near the bottom of the barrel and install the spigot or valve, ensuring a tight and secure fit.

  7. Connect the Downspout Diverter (Optional): If using a downspout diverter or rain barrel diverter kit, follow the manufacturer’s instructions to connect it to your existing downspout and the barrel.

  8. Level and Position the Barrel: Place the barrel on a level, stable surface near the downspout or desired water collection area.

  9. Secure and Stabilize: If necessary, secure the barrel to prevent tipping or movement, especially during heavy rain or wind.

  10. Enjoy Your Rainwater Harvest: Once set up, your rain barrel will start collecting rainwater, providing a sustainable and cost-effective water source for various household needs.

Read AlsoUnleashing Nature’s Magic: The Incredible Benefits of Composting Food Scraps and Reducing Waste

Choosing the Right Rain Barrel: A Comparison

When selecting a rain barrel, consider factors such as capacity, material, and features to ensure it meets your needs. Here’s a comparison table to help you make an informed decision:

Feature Plastic Barrel Wood Barrel Metal Barrel
Capacity Typically 50-100 gallons Varying sizes available Varying sizes available
Durability Moderate to high High High
Cost Affordable Moderate to expensive Moderate to expensive
Maintenance Low Moderate (require periodic sealing) Moderate (prone to rust)
Aesthetics Basic appearance Rustic and decorative Industrial or modern look
Insulation Poor Good insulation properties Poor to moderate insulation

Read AlsoThe Ultimate Guide to Upcycled Crafts for Adults: Unleash Your Creativity and Sustainability

Integrating Rain Barrels into Your Landscape

Once you’ve built your rain barrel, consider incorporating it into your landscaping for a cohesive and visually appealing setup. Here are a few ideas:

  • Raised Platform: Place the rain barrel on a raised platform or decorative stand to enhance its visibility and accessibility.
  • Screening or Fencing: Use decorative screening or fencing to conceal the rain barrel, creating a more seamless integration with your outdoor space.
  • Planting Around the Barrel: Surround the rain barrel with plants and flowers, creating a beautiful and functional garden area.
  • Paint or Decorate: Personalize your rain barrel by painting it or adding decorative elements to match your home’s aesthetic.

Read Also: https://ecoreef.co/2024/05/19/breathe-easy-discovering-air-quality-monitoring-stations-near-me/

By integrating your rain barrel into your landscape, you not only create a functional water-saving solution but also add a unique and creative touch to your outdoor living space.

Maintenance and Troubleshooting

To ensure your rain barrel functions optimally and lasts for years, it’s essential to follow proper maintenance practices:

  • Clean Regularly: Remove debris and clean the mesh screen periodically to prevent clogging and ensure smooth water flow.
  • Inspect for Leaks: Check for leaks around the spigot, overflow pipe, and connections, and apply sealant or replace parts as needed.
  • Winterize: In colder climates, drain and disconnect the rain barrel during the winter months to prevent freezing and potential damage.
  • Monitor Water Quality: Regularly check the water in your rain barrel for any signs of algae growth or contamination, and take appropriate measures to address any issues.

By following these simple maintenance steps, you can enjoy the benefits of your rain barrel for years to come.

Conclusion

Building a rain barrel for home use is an excellent way to contribute to a more sustainable future while saving money on your water bills. With the right materials and a bit of DIY enthusiasm, you can create a functional and eco-friendly rainwater harvesting system. Embrace this practical and rewarding project, and join the growing community of environmentally conscious individuals making a positive impact on our planet, one drop at a time.

Read Also: https://ecoreef.co/2024/05/19/unlock-the-secrets-to-a-lush-water-wise-garden-ways-to-conserve-water-in-the-garden/

Remember, every effort towards sustainability counts, and by building your own rain barrel, you’re taking a significant step in the right direction. So, what are you waiting for? Gather your materials, follow the step-by-step guide, and start harvesting rainwater today!

Categories: Uncategorized

Tips for Composting Yard Waste: A Comprehensive Guide

No Comments

Are you looking for a simple and effective way to reduce your environmental impact while simultaneously enriching your garden? Composting yard waste is an excellent solution that not only diverts organic matter from landfills but also transforms it into nutrient-rich soil amendments. In this comprehensive guide, we’ll explore the benefits of composting yard waste, provide step-by-step instructions, and share valuable tips to help you get started on your composting journey.

Read Also: The Best Zero Waste Grocery Stores Near You: A Comprehensive Guide and Comparison

Benefits of Composting Yard Waste

Composting yard waste offers numerous advantages for both you and the environment:

  1. Reduces Waste: By composting yard waste, you can significantly reduce the amount of organic matter sent to landfills, where it contributes to the production of methane, a potent greenhouse gas.

  2. Improves Soil Health: The nutrient-rich compost created from yard waste enhances soil structure, fertility, and water-holding capacity, promoting healthier plant growth.

  3. Saves Money: Instead of purchasing expensive commercial fertilizers, you can create your own high-quality compost for free, saving money while benefiting your garden.

  4. Supports Sustainable Gardening: Composting yard waste aligns with the principles of sustainable gardening, encouraging a closed-loop system where waste is transformed into a valuable resource.

Read Also: The Best Eco-Friendly Cleaning Products for Sensitive Skin: A Comprehensive Guide

Getting Started with Composting Yard Waste

Composting yard waste is a straightforward process that can be easily incorporated into your gardening routine. Here are the basic steps to get you started:

  1. Choose a Composting Method: There are various composting methods to choose from, including traditional bins, tumbling composters, or open piles. Select the method that best suits your needs and available space.

  2. Gather Your Materials: Collect a variety of yard waste, such as grass clippings, leaves, twigs, and branches (shredded or chopped into smaller pieces). You can also include other organic materials like fruit and vegetable scraps, coffee grounds, and shredded paper.

  3. Layer Your Compost: Begin by creating a base layer of coarse materials, such as twigs or small branches, to promote airflow. Then, alternate layers of green (nitrogen-rich materials like grass clippings and fruit/vegetable scraps) and brown (carbon-rich materials like leaves and shredded paper) materials.

  4. Maintain Proper Moisture and Aeration: Ensure that your compost pile has the right balance of moisture and aeration. The ideal moisture level should be similar to a wrung-out sponge, and regular turning or mixing will introduce oxygen, which is essential for the composting process.

  5. Monitor and Manage Your Compost: Keep an eye on your compost pile and make adjustments as needed. If it’s too dry, add water; if it’s too wet, incorporate more brown materials or turn it more frequently. As the materials break down, continue adding new yard waste and other organic matter to the pile.

Read Also: Unleashing Nature’s Magic: The Incredible Benefits of Composting Food Scraps and Reducing Waste

Advanced Tips for Successful Composting

While composting yard waste is relatively straightforward, there are several advanced tips that can help you optimize the process and achieve even better results:

  1. Use a Compost Aerator or Tumbler: Investing in a compost aerator or tumbler can significantly speed up the composting process by introducing more oxygen and facilitating thorough mixing.

  2. Incorporate Composting Worms: Vermicomposting, or composting with worms, can be an effective way to break down organic matter and produce nutrient-rich compost. Red wiggler worms are particularly well-suited for this purpose.

  3. Monitor Temperature: The ideal temperature range for efficient composting is between 135°F and 160°F (57°C and 71°C). Use a compost thermometer to track the temperature and make adjustments as needed.

  4. Consider a Compost Starter or Activator: Compost starters or activators, which contain beneficial microorganisms, can kick-start the composting process and accelerate the breakdown of organic matter.

  5. Experiment with Different Materials: While yard waste is an excellent base, you can experiment with incorporating other organic materials, such as shredded paper, cardboard, or even hair clippings, to create a diverse and nutrient-rich compost.

Read Also: The Ultimate Guide to Upcycled Crafts for Adults: Unleash Your Creativity and Sustainability

Comparison of Composting Methods

When it comes to composting yard waste, there are several methods to choose from. Here’s a comparison table to help you decide which method might work best for your needs:

Composting Method Pros Cons Best For
Traditional Bin or Pile Inexpensive, easy to set up Requires manual turning, can be unsightly Small to medium yards, low-maintenance gardeners
Tumbling Composter Efficient aeration, easier turning More expensive, requires space Medium to large yards, frequent composters
Vermicomposting (Worm Bin) Produces nutrient-rich compost, compact Requires monitoring and maintenance Small spaces, indoor composting
Hot Composting Rapid decomposition, kills weed seeds and pathogens Requires frequent monitoring and turning Large volumes of yard waste, experienced composters
Cold Composting Low maintenance, slower process Less effective at killing weed seeds and pathogens Small yards, patient gardeners

Consider factors such as the size of your yard, the volume of yard waste you generate, and your desired level of involvement when choosing the composting method that best suits your needs.

Read Also: Reducing Your Water Footprint: Simple Steps for a More Sustainable Home

Troubleshooting Common Composting Issues

Even with the best intentions, composting yard waste can sometimes present challenges. Here are some common issues and solutions to help you get back on track:

  1. Foul Odors: If your compost pile emits an unpleasant smell, it may be too wet or lacking in aeration. Add more brown materials (like shredded paper or dry leaves) and turn the pile more frequently to introduce oxygen.

  1. Slow Decomposition: If the materials in your compost pile are not breaking down as quickly as desired, the pile may be too dry or lacking in nitrogen. Add water and incorporate more green materials (like grass clippings or fruit/vegetable scraps) to provide moisture and nitrogen.

  2. Pests or Rodents: If you notice pests or rodents attracted to your compost pile, avoid adding meat, dairy, or fatty foods, which can attract unwanted visitors. Ensure that food scraps are buried deep within the pile and cover the top with a layer of soil or finished compost.

  3. Excess Moisture: If your compost pile becomes overly saturated, it can lead to anaerobic conditions and foul odors. Add more brown materials to absorb excess moisture, and consider covering the pile during periods of heavy rain.

  4. Temperature Issues: If your compost pile is not heating up as expected, it may lack the proper balance of green and brown materials or sufficient aeration. Adjust the ratios and turn the pile more frequently to introduce oxygen.

By addressing these common issues promptly, you can ensure a smooth and successful composting process.

Incorporating Compost into Your Garden

Once your yard waste has transformed into rich, earthy compost, it’s time to reap the benefits in your garden. Here are a few ways to incorporate your homemade compost:

  1. Top-dressing: Spread a layer of compost (approximately 1-2 inches thick) over your garden beds or lawn and gently work it into the soil. This will provide a nutrient boost for your plants and improve soil structure.

  2. Potting Mix: Combine compost with potting soil or other growing media when potting plants or starting seedlings. The compost will provide essential nutrients and improve moisture retention.

  3. Mulching: Use compost as a mulch around your plants, trees, and shrubs. It will suppress weeds, retain moisture, and gradually break down to enrich the soil.

  4. Compost Tea: Steep compost in water to create a nutrient-rich “tea” that can be used as a foliar spray or soil drench for your plants.

Remember, compost is a valuable resource, so use it wisely and reap the benefits of your hard work in the form of healthier plants and a thriving garden.

Read Also: The Best Zero Waste Grocery Stores Near You: A Comprehensive Guide and Comparison

Conclusion

Composting yard waste is a simple and rewarding practice that not only reduces waste but also provides a nutrient-rich soil amendment for your garden. By following the tips and techniques outlined in this guide, you can establish an efficient composting system tailored to your needs. Embrace the joy of transforming organic matter into a valuable resource, and enjoy the benefits of a healthier, more sustainable garden. Remember, every small step towards composting contributes to a greener future for our planet.

Read Also: The Best Eco-Friendly Cleaning Products for Sensitive Skin: A Comprehensive Guide

Categories: Uncategorized

Green Building Materials for Home Renovation: Embrace Sustainability and Eco-Friendliness

No Comments

As environmental awareness continues to grow, homeowners are increasingly seeking sustainable solutions for their renovation projectsGreen building materials have emerged as a game-changer, offering an eco-friendly alternative to traditional construction supplies. By incorporating these materials into your home renovation, you can reduce your carbon footprint, promote energy efficiency, and create a healthier living environment while embracing sustainability.

In this comprehensive guide, we’ll explore the world of green building materials, their benefits, and how to incorporate them seamlessly into your renovation project.

Understanding Green Building Materials

Green building materials are products derived from renewable, recycled, or reused sources that have a minimal negative impact on the environment. These materials are designed to be energy-efficient, durable, and low in toxic emissions, making them an excellent choice for eco-conscious homeowners.

Some common examples of green building materials include:

  • Bamboo: A rapidly renewable resource, bamboo is an excellent alternative to traditional hardwood flooring and cabinetry.
  • Recycled Plastic: Recycled plastic can be transformed into a variety of building materials, such as decking, siding, and insulation.
  • Reclaimed Wood: Salvaged from old buildings or other sources, reclaimed wood adds character and charm to any renovation project while reducing waste.
  • Insulated Concrete Forms (ICFs): These pre-insulated concrete blocks provide superior insulation and energy efficiency for walls and foundations.

Benefits of Using Green Building Materials

Incorporating green building materials into your home renovation project offers numerous benefits, including:

  1. Environmental Impact: By choosing eco-friendly materials, you’re reducing your carbon footprint and minimizing the strain on natural resources.
  2. Energy Efficiency: Many green building materials are designed to improve insulation and reduce energy consumption, leading to lower utility bills.
  3. Improved Indoor Air Quality: These materials often have low or no volatile organic compound (VOC) emissions, creating a healthier indoor environment.
  4. Durability: Many green building materials are known for their longevity and resistance to wear and tear, reducing the need for frequent replacements.

Comparison of Popular Green Building Materials

To help you make an informed decision, here’s a comparison table of some popular green building materials:

Material Renewable Recycled Energy Efficient Durability Indoor Air Quality Cost
Bamboo Yes No Moderate High Excellent Moderate
Recycled Plastic No Yes Moderate High Good Low
Reclaimed Wood Partial Yes Moderate High Excellent Moderate
Insulated Concrete Forms (ICFs) No Partial High High Excellent High
Cork Yes No High Moderate Excellent Moderate
Sheep’s Wool Insulation Yes No High Moderate Excellent High

As you can see, each material has its own unique advantages and considerations. It’s essential to evaluate your specific needs, budget, and project requirements when selecting the right green building materials for your renovation.

Incorporating Green Building Materials into Your Renovation

Integrating green building materials into your home renovation project requires careful planning and execution. Here are some tips to help you get started:

  1. Assess Your Needs: Evaluate the areas of your home that require renovation and determine the specific materials you’ll need. This will help you identify suitable green alternatives.

  2. Research and Compare Options: Explore different green building material options and compare their respective features, costs, and availability in your area. Read reviews and seek recommendations from professionals or homeowners who have used these materials.

  3. Work with Experienced Contractors: Collaborate with contractors who have expertise in working with green building materials. They can provide valuable insights and ensure proper installation for optimal performance.

  4. Consider Certifications: Look for materials that have been certified by reputable organizations, such as the Forest Stewardship Council (FSC), Cradle to Cradle, or GREENGUARD. These certifications ensure that the products meet stringent environmental and health standards.

  5. Combine with Energy-Efficient Systems: To maximize the benefits of your green renovation, consider integrating energy-efficient systems like solar panels, geothermal heating and cooling, and smart home technologies.

  6. Educate Yourself: Stay informed about the latest developments in green building materials and sustainable construction practices. Attend workshops, read industry publications, and connect with like-minded individuals to stay up-to-date.

Real-Life Examples and Inspiration

To help you visualize the potential of green building materials, let’s explore some inspiring real-life examples:

Conclusion

Embracing green building materials for your home renovation is not only an environmentally responsible choice but also a smart investment in the long-term sustainability and well-being of your home. By incorporating these eco-friendly materials, you’re contributing to a greener future while creating a healthier and more energy-efficient living space.

Remember, every small step counts, and choosing sustainable options for your renovation project can have a significant positive impact on the environment. Embark on your green renovation journey today and experience the numerous benefits of embracing sustainability in your home.

Read Also: Reducing Your Water Footprint: Simple Steps for a More Sustainable Home

Categories: Uncategorized

Embrace the Power of the Sun: DIY Solar Phone Charger Kit

5 Comments

In a world where our reliance on technology continues to grow, keeping our devices charged and ready for use has become a necessity. With the increasing concern for sustainability and reducing our carbon footprint, solar power has emerged as a clean and renewable solution. Enter the DIY solar phone charger kit, a versatile and eco-friendly option that allows you to harness the power of the sun to keep your phones and other devices charged on the go.

Whether you’re an avid outdoorsperson, a frequent traveler, or someone who values preparedness, a DIY solar phone charger kit can be a game-changer. Not only does it provide a reliable source of power, but it also offers a unique opportunity to learn about renewable energy and contribute to a more sustainable future. With its user-friendly design and comprehensive instructions, even those with little to no experience in electronics can easily assemble and enjoy the benefits of this innovative device.

Read Also: Endangered Species in North America: A Race Against Time

The Advantages of a DIY Solar Phone Charger Kit

  1. Eco-Friendly and Sustainable: By harnessing the power of the sun, a DIY solar phone charger kit eliminates the need for traditional electricity sources, reducing your carbon footprint and promoting a more sustainable lifestyle.

  2. Cost-Effective: While commercial solar chargers can be expensive, a DIY kit offers a cost-effective solution, allowing you to save money while still enjoying the benefits of solar power.

  3. Portable and Convenient: Designed with portability in mind, these kits are lightweight and compact, making them perfect for outdoor adventures, camping trips, or even daily commutes.

  4. Educational and Engaging: Assembling a DIY solar phone charger kit can be a fun and educational experience, providing insight into the principles of solar energy and fostering a deeper appreciation for renewable technologies.

  5. Versatile and Compatible: Most kits are compatible with a wide range of devices, including smartphones, tablets, and various USB-chargeable gadgets, ensuring that you can keep all your essential electronics powered up.

Read Also: Breathe Easy: Discovering Air Quality Monitoring Stations Near Me

Choosing the Right DIY Solar Phone Charger Kit

With numerous options available in the market, selecting the right DIY solar phone charger kit can be a daunting task. To help you make an informed decision, consider the following factors:

  1. Solar Panel Efficiency: The efficiency of the solar panel plays a crucial role in determining the charging speed and overall performance of the kit. Higher-efficiency panels typically offer faster charging times but may come at a higher cost.

  2. Battery Capacity: The battery capacity of the kit determines how much power it can store and how long it can charge your devices. Consider your intended usage and choose a kit with a battery capacity that meets your needs.

  3. Portability and Durability: If you plan to use your solar charger kit outdoors or while traveling, prioritize portability and durability. Look for kits with rugged and compact designs that can withstand the elements.

  4. Compatibility: Ensure that the kit is compatible with the devices you intend to charge. Check the specifications and voltage requirements to avoid any compatibility issues.

  5. Ease of Assembly: While most DIY solar phone charger kits are designed for easy assembly, some may be more user-friendly than others. Consider your skill level and choose a kit with clear instructions and accessible customer support if needed.

Read Also: Unlock the Secrets to a Lush Water-Wise Garden: Ways to Conserve Water in the Garden

Comparison of Popular DIY Solar Phone Charger Kits

To help you make an informed decision, we’ve compiled a comparison table of some popular DIY solar phone charger kits on the market:

Kit Name Solar Panel Efficiency Battery Capacity Portability Compatibility Ease of Assembly
SolarPal 22% 10,000mAh Excellent Wide Easy
SunVolt 18% 8,000mAh Good Wide Moderate
EcoFlow 20% 12,000mAh Very Good Limited Moderate
SunKing 16% 6,000mAh Excellent Wide Easy
PowerGo 24% 10,000mAh Good Wide Challenging

Please note that this comparison is based on publicly available information and may vary depending on individual experiences and preferences.

Assembling Your DIY Solar Phone Charger Kit

Once you’ve selected the perfect DIY solar phone charger kit, the real fun begins – assembling it! Most kits come with detailed instructions and all the necessary components, making the assembly process straightforward and engaging.

  1. Unpack and Inventory: Start by carefully unpacking the kit and ensuring that all the required components are present. This typically includes a solar panel, a battery pack, charging cables, and any necessary tools or hardware.

  2. Read the Instructions: Thoroughly read through the instructions provided by the manufacturer. This will not only guide you through the assembly process but also provide valuable insights into the kit’s functionality and safety precautions.

  3. Assemble the Components: Follow the step-by-step instructions to assemble the kit. This may involve connecting the solar panel to the battery pack, attaching any mounting hardware, and ensuring proper cable connections.

  4. Test and Calibrate: Once assembled, it’s essential to test your DIY solar phone charger kit to ensure that it’s functioning correctly. This may involve calibrating the solar panel orientation, checking the battery charge level, and testing the charging capabilities with your devices.

  5. Personalize and Enjoy: With your DIY solar phone charger kit fully assembled and tested, you can now personalize it to suit your preferences. Consider adding decorative elements, customizing the carry case, or even experimenting with different solar panel mounting options.

Read Also: Reducing Your Water Footprint: Simple Steps for a More Sustainable Home

Maximizing the Efficiency of Your DIY Solar Phone Charger Kit

To get the most out of your DIY solar phone charger kit, it’s crucial to understand the factors that influence its efficiency and optimize its performance accordingly:

  1. Sunlight Exposure: The amount of sunlight your solar panel receives is directly proportional to its charging efficiency. Position your panel in an area that receives direct sunlight for the majority of the day, and consider using a adjustable mounting system or stand to optimize the panel’s orientation towards the sun.

  2. Panel Orientation: The angle at which your solar panel is positioned can significantly impact its ability to capture sunlight effectively. Consult the manufacturer’s recommendations or use a sun tracker app to determine the optimal panel orientation for your location and time of day.

  3. Battery Management: Proper battery management is essential for prolonging the life and performance of your solar charger’s battery pack. Avoid leaving the battery fully discharged for extended periods, and follow the recommended charging and storage practices outlined in the instruction manual.

  4. Shading and Obstructions: Ensure that your solar panel is free from any shading or obstructions that could block sunlight from reaching the surface. Even partial shading can significantly reduce the panel’s efficiency, so choose your panel location carefully.

  5. Temperature Considerations: Extreme temperatures can affect the performance of both the solar panel and the battery pack. Protect your kit from excessive heat or cold by providing proper ventilation and shading when necessary.

  6. Regular Maintenance: Like any other electronic device, your DIY solar phone charger kit requires regular maintenance to ensure optimal performance. Clean the solar panel surface periodically to remove dust, dirt, or debris that could interfere with sunlight absorption.

Read Also: The Devastating Effects of Deforestation on Climate Change

Embracing a Sustainable Future with DIY Solar Phone Charger Kits

As our reliance on technology continues to grow, embracing sustainable solutions like DIY solar phone charger kits becomes increasingly important. Not only do these kits provide a reliable and eco-friendly way to keep our devices charged, but they also offer a unique opportunity to learn about renewable energy and contribute to a greener future.

By assembling and using a DIY solar phone charger kit, you’re taking a proactive step towards reducing your carbon footprint and promoting a more sustainable lifestyle. Imagine the sense of empowerment and satisfaction that comes from harnessing the power of the sun to charge your devices while enjoying the great outdoors or embarking on an adventurous journey.

Moreover, the educational aspect of these kits cannot be overlooked. Engaging with the assembly process and understanding the principles behind solar energy can spark a newfound appreciation for renewable technologies and inspire others to explore eco-friendly solutions.

So, why not embark on this exciting journey and embrace the power of the sun? Invest in a DIY solar phone charger kit today and join the growing movement towards a more sustainable and resilient future. Together, we can make a positive impact on our planet, one charged device at a time.

Don’t forget to check out these related articles for more sustainable living tips and insights:

Categories: Uncategorized

Breathe Easy: Discovering Air Quality Monitoring Stations Near Me

1 Comment

In today’s increasingly urbanized world, air pollution has become a significant concern for many communities. From vehicle emissions to industrial activities, various sources contribute to the degradation of air quality, posing potential health risks. Fortunately, advances in technology have led to the development of air quality monitoring stations that provide valuable insights into the air we breathe. In this comprehensive guide, we’ll explore the importance of these stations, how to find them near you, and the benefits they offer.

The first step towards addressing air pollution is understanding its impact. Poor air quality can exacerbate respiratory conditions such as asthma, allergies, and chronic obstructive pulmonary disease (COPD). It has also been linked to an increased risk of cardiovascular diseases and certain types of cancer. By monitoring air quality, these stations play a crucial role in identifying potential health hazards and informing decision-makers about the necessary steps to improve air quality.

[Read Also: Unleashing Nature’s Magic: The Incredible Benefits of Composting Food Scraps and Reducing Waste]

Understanding Air Quality Monitoring Stations

Air quality monitoring stations are sophisticated systems designed to measure various pollutants in the air. These stations typically monitor common air pollutants such as particulate matter (PM2.5 and PM10), ground-level ozone (O3), carbon monoxide (CO), sulfur dioxide (SO2), and nitrogen oxides (NOx). Some advanced stations may also measure other pollutants like volatile organic compounds (VOCs) and heavy metals.

These stations employ a variety of instruments and sensors to detect and quantify the concentration of pollutants in the air. The data collected is then processed, analyzed, and reported in real-time or at regular intervals, providing valuable information to environmental agencies, researchers, and the public.

[Read Also: The Best Zero Waste Grocery Stores Near You: A Comprehensive Guide and Comparison]

Finding Air Quality Monitoring Stations Near You

Locating air quality monitoring stations near you has become easier than ever, thanks to various online resources and mobile applications. Here are some methods to find these stations in your area:

  1. Government Websites: Many state and local environmental agencies maintain websites that provide information on air quality monitoring stations. These sites often feature interactive maps or lists of station locations, along with real-time or historical data.

  2. Air Quality Apps: Several mobile applications, such as AirVisual, BreezoMeter, and Air Matters, offer real-time air quality data and maps that display nearby monitoring stations. These apps can be particularly useful for on-the-go access to air quality information.

  3. Online Mapping Tools: Platforms like Google Maps and Bing Maps sometimes display the locations of air quality monitoring stations in certain areas. You can search for “air quality monitoring stations near me” or similar terms to find stations in your vicinity.

  4. Community Groups and Organizations: Local environmental groups, citizen science initiatives, and non-profit organizations may also maintain databases or resources that provide information on air quality monitoring stations in your area.

[Read Also: The Greener Wanderer’s Guide: Embracing Sustainable Adventures Worldwide]

Benefits of Air Quality Monitoring Stations

Access to air quality monitoring stations offers several benefits to individuals, communities, and policymakers:

  1. Awareness and Education: By providing real-time data on air quality, these stations raise awareness about pollution levels and their potential health impacts. This information can empower individuals to take proactive measures to protect their well-being, such as limiting outdoor activities during periods of high pollution.

  2. Identifying Pollution Hotspots: Air quality monitoring stations can help identify areas with persistently high levels of pollution, commonly referred to as “hotspots.” This information can guide authorities in implementing targeted measures to mitigate pollution sources in those areas.

  3. Informing Policy and Regulations: Data from air quality monitoring stations serves as a critical resource for policymakers and regulatory bodies. It helps them assess the effectiveness of existing air quality policies and develop new strategies to improve air quality standards and protect public health.

  4. Research and Analysis: Researchers and scientists rely on air quality monitoring data to study the sources, transport, and impacts of air pollution. This information contributes to a better understanding of air quality dynamics and the development of effective mitigation strategies.

  5. Community Engagement: Many air quality monitoring initiatives involve community participation, fostering a sense of ownership and empowerment. By actively monitoring their local air quality, communities can advocate for cleaner air and hold polluters accountable.

[Read Also: The Best Eco-Friendly Cleaning Products for Sensitive Skin: A Comprehensive Guide]

Comparing Air Quality Monitoring Stations

When searching for air quality monitoring stations near you, it’s essential to understand the different types of stations and the pollutants they measure. Here’s a comparison table to help you make an informed decision:

Station Type Pollutants Measured Typical Locations Data Availability
Government-Operated PM2.5, PM10, O3, CO, SO2, NOx Urban areas, industrial sites, roadways Real-time or hourly/daily updates on government websites
Research/Academic PM2.5, PM10, O3, CO, SO2, NOx, VOCs, heavy metals Urban areas, rural areas, near emission sources Real-time or periodic data sharing for research purposes
Community-Based PM2.5, PM10, O3 Residential areas, schools, parks Real-time or periodic updates on community platforms
Low-Cost Sensor Networks PM2.5, PM10, O3 Various locations, crowd-sourced data Real-time or periodic updates on dedicated websites/apps

Note that the pollutants measured and data availability may vary depending on the specific station and its purpose. Some stations may focus on specific pollutants of concern in their area, while others aim to provide a more comprehensive overview of air quality.

[Read Also: The Ultimate Guide to Upcycled Crafts for Adults: Unleash Your Creativity and Sustainability]

Interpreting Air Quality Data

Once you’ve located air quality monitoring stations near you, it’s crucial to understand how to interpret the data they provide. Most stations report air quality using the Air Quality Index (AQI), which categorizes air pollution levels into different ranges:

  • Good (0-50 AQI): Air quality is considered satisfactory, and air pollution poses little or no risk.
  • Moderate (51-100 AQI): Air quality is acceptable, but some pollutants may pose a moderate health concern for a small number of individuals.
  • Unhealthy for Sensitive Groups (101-150 AQI): Members of sensitive groups (e.g., children, older adults, people with respiratory diseases) may experience health effects. The general public is less likely to be affected.
  • Unhealthy (151-200 AQI): Everyone may begin to experience adverse health effects, and members of sensitive groups may experience more severe effects.
  • Very Unhealthy (201-300 AQI): Health alerts are triggered, and the risk of respiratory effects is increased for the entire population.
  • Hazardous (301+ AQI): Emergency conditions exist, and the entire population is more likely to be affected by serious health effects.

By understanding the AQI and monitoring air quality levels, individuals can take appropriate precautions, such as limiting outdoor activities or using air purifiers, to minimize their exposure to harmful pollutants.

In conclusion, air quality monitoring stations near you provide invaluable information about the air we breathe. By leveraging these resources, individuals and communities can stay informed about local air quality conditions, take proactive measures to protect their health, and advocate for cleaner air.

Categories: Uncategorized

Endangered Species in North America: A Race Against Time

2 Comments

The rich biodiversity of North America is a testament to the continent’s diverse ecosystems, ranging from the arid deserts of the Southwest to the lush rainforests of the Pacific Northwest. However, this natural treasure trove faces an unprecedented challenge as numerous species teeter on the brink of extinction. From iconic mammals to delicate flora, the battle to preserve endangered species in North America has become more pressing than ever.

In this comprehensive article, we will delve into the plight of some of the most threatened species, explore the causes behind their dwindling numbers, and highlight the crucial conservation efforts underway. Additionally, we will examine the importance of sustainable tourism and eco-friendly adventures worldwide, as well as the impact of zero-waste grocery stores and eco-friendly cleaning products on preserving our natural heritage.

The Majestic Grizzly Bear

Few animals capture the essence of North America’s untamed wilderness like the grizzly bear. These imposing creatures once roamed the vast expanses of the continent, but their numbers have dwindled significantly due to habitat loss, human encroachment, and hunting.

The grizzly bear population in the lower 48 states is estimated to be around 1,500, primarily concentrated in the Greater Yellowstone Ecosystem and the Northern Continental Divide Ecosystem. While their numbers have stabilized in recent years, thanks to conservation efforts, the threat of habitat fragmentation and human-wildlife conflicts continues to loom large.

Read Also: Unleashing Nature’s Magic: The Incredible Benefits of Composting Food Scraps and Reducing Waste

The Black-footed Ferret: A Struggle for Survival

Once thought to be extinct, the black-footed ferret is a testament to the resilience of nature and the dedication of conservationists. These small, charismatic creatures are intrinsically linked to the prairie dog colonies they call home, relying on them for food and shelter.

In the 1980s, a small population of black-footed ferrets was discovered in Wyoming, sparking an intensive captive breeding program. Today, their numbers have increased to around 300 in the wild, but their survival remains precarious due to habitat loss, disease, and the decline of prairie dog populations.

The Whooping Crane: A Majestic Comeback

The whooping crane is a true symbol of hope in the world of endangered species conservation. Standing tall at nearly 5 feet, these magnificent birds were once on the brink of extinction, with only 16 individuals remaining in the 1940s.

Through dedicated efforts, including captive breeding programs and habitat protection, the whooping crane population has slowly recovered. As of 2022, there are approximately 800 birds in the wild and captivity, a remarkable achievement in the face of daunting challenges.

Read Also: The Ultimate Guide to Upcycled Crafts for Adults: Unleash Your Creativity and Sustainability

Threats to Endangered Species in North America

The threats faced by endangered species in North America are multifaceted and often interconnected. Here are some of the primary factors contributing to their decline:

  1. Habitat Loss and Fragmentation: Urban development, agriculture, and resource extraction have significantly reduced and fragmented the habitats of numerous species, disrupting their natural ecosystems and migratory patterns.

  2. Climate Change: Rising temperatures, shifting precipitation patterns, and extreme weather events are altering ecosystems, making it difficult for some species to adapt and survive.

  3. Pollution and Contaminants: Industrial activities, agricultural runoff, and plastic waste can contaminate water sources and food chains, posing serious health risks to vulnerable species.

  4. Overexploitation: Unsustainable hunting, fishing, and poaching have decimated populations of various species, often driven by the demand for wildlife products or sport hunting.

  5. Invasive Species: The introduction of non-native species can disrupt delicate ecosystems, outcompeting native species for resources and altering the ecological balance.

Conservation Efforts and Challenges

Protecting endangered species in North America requires a multifaceted approach, involving government agencies, non-profit organizations, scientists, and local communities. Here are some of the key conservation efforts underway:

  1. Habitat Protection and Restoration: Establishing and expanding protected areas, such as national parks and wildlife refuges, is crucial for preserving habitats and preventing further fragmentation.

  2. Captive Breeding and Reintroduction Programs: These programs aim to bolster populations of critically endangered species and reintroduce them into suitable habitats, as demonstrated by the success of the whooping crane recovery efforts.

  3. Sustainable Practices: Promoting sustainable agriculture, forestry, and resource extraction can help mitigate the impacts of human activities on vulnerable species and their habitats.

  4. Public Education and Awareness: Raising public awareness about the importance of biodiversity and the plight of endangered species is essential for garnering support and fostering responsible behavior.

  5. International Cooperation: Many species transcend national borders, necessitating international cooperation and coordinated conservation strategies across North America.

Despite these efforts, significant challenges remain, including limited funding, conflicting interests, and the complexity of balancing conservation goals with economic development and human needs.

Comparison Table: Conservation Status of Selected Endangered Species in North America

Species Conservation Status Population Estimate Primary Threats
Grizzly Bear Threatened ~1,500 in the lower 48 states Habitat loss, human-wildlife conflicts
Black-footed Ferret Endangered ~300 in the wild Habitat loss, disease, prairie dog decline
Whooping Crane Endangered ~800 in the wild and captivity Habitat loss, hunting, power line collisions
Florida Panther Endangered ~120-230 in the wild Habitat loss, vehicle collisions, inbreeding
Kemp’s Ridley Sea Turtle Critically Endangered ~25,000 nesting females Bycatch, coastal development, pollution

The Way Forward: Sustainable Living and Eco-Consciousness

Protecting endangered species in North America requires a collective effort from individuals, communities, and governments. By embracing sustainable practices and eco-conscious lifestyles, we can reduce our environmental footprint and contribute to the preservation of these precious species.

One way to make a difference is by supporting zero-waste grocery stores and eco-friendly cleaning products, which can help minimize waste and reduce the impact of harmful chemicals on ecosystems. Additionally, embracing sustainable adventures worldwide and supporting eco-tourism initiatives can raise awareness and generate revenue for conservation efforts.

Furthermore, simple actions like composting food scraps, reducing plastic consumption, and supporting upcycled crafts can have a significant impact on preserving the natural habitats of endangered species.

Categories: Uncategorized

The Devastating Effects of Deforestation on Climate Change

1 Comment

Forests are the lungs of our planet, playing a crucial role in regulating the Earth’s climate and supporting biodiversity. However, the alarming rate of deforestation has become a significant threat to the environment, contributing to the escalating effects of climate change. This article delves into the intricate relationship between deforestation and climate change, exploring the devastating consequences of this environmental crisis and potential solutions to mitigate its impact.

As we embark on this journey of understanding, it’s essential to acknowledge the significance of sustainable practices. For those seeking inspiration, The Greener Wanderer’s Guide: Embracing Sustainable Adventures Worldwide offers valuable insights into eco-friendly travel. Additionally, The Best Zero Waste Grocery Stores Near You: A Comprehensive Guide and Comparison and The Best Eco-Friendly Cleaning Products for Sensitive Skin: A Comprehensive Guide provide practical tips for adopting a more sustainable lifestyle.

The Role of Forests in Climate Regulation

Forests act as natural carbon sinks, absorbing and storing vast amounts of carbon dioxide (CO2) from the atmosphere through photosynthesis. This process helps mitigate the greenhouse effect, which is a primary driver of climate change. However, when forests are cleared or burned, the stored carbon is released back into the atmosphere, exacerbating the accumulation of greenhouse gases.

According to the Food and Agriculture Organization of the United Nations (FAO), deforestation is responsible for approximately 12% of global greenhouse gas emissions, making it a significant contributor to climate change. The loss of these vital carbon sinks reduces the Earth’s capacity to regulate atmospheric CO2 levels, further amplifying the warming effect.

Read Also: Unleashing Nature’s Magic: The Incredible Benefits of Composting Food Scraps and Reducing Waste

Impacts of Deforestation on Climate Change

The effects of deforestation on climate change are far-reaching and multifaceted. Here are some of the primary impacts:

  1. Increased Greenhouse Gas Emissions: As mentioned earlier, the burning and decomposition of cleared forests release vast amounts of stored carbon into the atmosphere, contributing to the rise of greenhouse gas levels.

  2. Loss of Carbon Sinks: Forests act as natural carbon sinks, absorbing and storing atmospheric CO2. Deforestation diminishes the Earth’s capacity to regulate carbon levels, further exacerbating climate change.

  3. Disruption of Local and Global Weather Patterns: Forests play a crucial role in regulating local and global weather patterns through evapotranspiration and their influence on precipitation cycles. Deforestation can lead to changes in temperature, rainfall patterns, and the frequency of extreme weather events.

  4. Biodiversity Loss: Forests are home to a vast array of plant and animal species. Deforestation leads to habitat loss and fragmentation, endangering numerous species and disrupting delicate ecological balances.

  5. Soil Erosion and Desertification: The removal of forests can lead to soil erosion, degradation, and desertification, further exacerbating the impacts of climate change on ecosystems and agriculture.

Read Also: The Ultimate Guide to Upcycled Crafts for Adults: Unleash Your Creativity and Sustainability

Comparison of Deforestation Rates and Impacts

To better understand the magnitude of the problem, let’s compare the deforestation rates and impacts across different regions:

Region Deforestation Rate (hectares/year) Primary Impacts
Amazon Rainforest 1.5 million Loss of biodiversity, disruption of water cycles, increased CO2 emissions
Southeast Asia 1.2 million Habitat loss, soil erosion, decreased air quality
Sub-Saharan Africa 1 million Desertification, loss of arable land, displacement of communities
Russia and Eastern Europe 0.5 million Disruption of boreal forests, loss of carbon sinks

The data highlights the alarming rate of deforestation globally and the devastating consequences it has on ecosystems, biodiversity, and climate regulation. Addressing this issue requires a concerted effort from governments, organizations, and individuals alike.

Potential Solutions and Mitigation Strategies

While the challenges posed by deforestation and climate change are daunting, there are potential solutions and mitigation strategies that can be implemented:

  1. Sustainable Forest Management: Adopting sustainable forestry practices, such as selective logging, reforestation, and agroforestry, can help maintain the ecological balance and preserve carbon sinks.

  2. Protected Areas and Conservation Efforts: Establishing and enforcing protected areas, national parks, and wildlife sanctuaries can safeguard remaining forests and biodiversity hotspots.

  3. Reducing Demand for Unsustainable Products: Consumers can make conscious choices to reduce the demand for products derived from unsustainable practices, such as palm oil, illegal timber, and unsustainable agriculture.

  4. Promoting Renewable Energy and Sustainable Agriculture: Transitioning to renewable energy sources and implementing sustainable agricultural practices can reduce the pressure on forests for land clearance and fuelwood.

  5. International Collaboration and Policy Reforms: Addressing deforestation and climate change requires global cooperation, policy reforms, and financial incentives to support sustainable forest management and conservation efforts.

By embracing these solutions and mitigation strategies, we can work towards preserving our forests, mitigating the effects of climate change, and securing a more sustainable future for our planet.

Read Also: Unleashing Nature’s Magic: The Incredible Benefits of Composting Food Scraps and Reducing Waste

Conclusion

The effects of deforestation on climate change are undeniable and far-reaching. As forests continue to disappear at an alarming rate, the consequences for our planet’s delicate ecosystems and climate stability become increasingly severe. It is imperative that we take immediate action to address this pressing issue through sustainable practices, conservation efforts, and global cooperation.

By recognizing the vital role forests play in regulating the Earth’s climate and supporting biodiversity, we can work towards preserving these invaluable natural resources. Embracing sustainable lifestyles, such as those outlined in The Greener Wanderer’s Guide: Embracing Sustainable Adventures WorldwideThe Best Zero Waste Grocery Stores Near You: A Comprehensive Guide and Comparison, and The Best Eco-Friendly Cleaning Products for Sensitive Skin: A Comprehensive Guide, can contribute to a more sustainable future for our planet.

Remember, every small step towards reducing our carbon footprint and preserving our forests makes a difference. Together, we can mitigate the effects of deforestation on climate change and pave the way for a greener, more sustainable world.

Categories: Uncategorized

Reducing Your Water Footprint: Simple Steps for a More Sustainable Home

2 Comments

Water is a precious resource that sustains all life on our planet. However, with growing populations and increasing demand, our water resources are under immense stress. According to the United Nations, by 2025, two-thirds of the world’s population may face water shortages. As individuals, we can play a crucial role in conserving water and reducing our water footprint. In this comprehensive guide, we’ll explore practical strategies and tips to minimize water consumption in your home, fostering a more sustainable lifestyle.

Read Also: The Greener Wanderer’s Guide: Embracing Sustainable Adventures Worldwide

Understanding Your Water Footprint

Before we delve into water-saving techniques, it’s essential to understand what a water footprint is. Your water footprint refers to the total volume of freshwater consumed directly and indirectly by your household activities. This includes water used for drinking, cooking, bathing, cleaning, and even the water required to produce the goods and services you consume.

An average American household consumes around 300 gallons of water per day, with a significant portion being used for outdoor purposes such as landscaping and swimming pools. By becoming aware of your water footprint, you can identify areas where water conservation efforts can have the most significant impact.

Bathroom Water Conservation

The bathroom is one of the most water-intensive areas in your home. Simple adjustments can yield significant water savings:

  1. Install Low-Flow Fixtures: Replace old showerheads, faucets, and toilets with low-flow or water-efficient models. These fixtures can reduce water consumption by up to 50% without compromising performance.

  2. Take Shorter Showers: Limit your shower time to 5 minutes or less. Consider installing a water-efficient showerhead that can save up to 2.5 gallons per minute.

  3. Turn Off the Tap: While brushing your teeth, shaving, or lathering up in the shower, turn off the water to prevent unnecessary waste.

  4. Fix Leaks: Regularly check for and repair any leaks in faucets, toilets, and pipes. A slow drip can waste up to 10 gallons of water per day.

Read Also: The Best Zero Waste Grocery Stores Near You: A Comprehensive Guide and Comparison

Kitchen Water Conservation

The kitchen is another high-water consumption area, but with a few simple adjustments, you can significantly reduce your water footprint:

  1. Scrape Dishes Before Washing: Instead of rinsing dishes under running water, scrape them clean and soak them in a basin or dishpan.

  2. Run Full Loads: Only run your dishwasher and washing machine when they are full to maximize water efficiency.

  3. Reuse Water: Capture and reuse water from cooking or washing fruits and vegetables to water indoor plants or clean other areas of your home.

  4. Install a Water Filter: Instead of letting the tap run until the water gets cold, install a water filter to eliminate the need for letting water run unnecessarily.

Outdoor Water Conservation

Landscaping and outdoor water usage can account for a significant portion of a household’s water footprint. Consider the following strategies:

  1. Xeriscape Your Landscape: Replace water-intensive lawns and gardens with drought-resistant, native plants that require minimal watering.

  2. Install a Rain Barrel: Collect and store rainwater for later use in your garden or for other outdoor purposes.

  3. Use Mulch: Apply a layer of mulch around plants and trees to retain moisture and reduce evaporation.

  4. Water Wisely: Water your lawn and garden in the early morning or evening when temperatures are cooler to minimize evaporation.

Read Also: The Best Eco-Friendly Cleaning Products for Sensitive Skin: A Comprehensive Guide

Appliance and Fixture Comparison

When upgrading your home’s fixtures and appliances, choose water-efficient models to maximize your water savings. Here’s a comparison table to help you make an informed decision:

Product Water Consumption Water Savings (Compared to Standard Models)
Low-Flow Showerhead 2.5 gallons per minute Up to 50%
Low-Flow Faucet Aerator 1.5 gallons per minute Up to 30%
High-Efficiency Toilet 1.28 gallons per flush Up to 20%
Energy Star Certified Dishwasher 3.5 gallons per cycle Up to 30%
Front-Loading Washing Machine 15-30 gallons per load Up to 50%

By investing in these water-efficient products, you not only conserve water but also save money on your utility bills in the long run.

Read Also: Unleashing Nature’s Magic: The Incredible Benefits of Composting Food Scraps and Reducing Waste

Additional Water Conservation Tips

  1. Educate Family Members: Involve your entire household in water conservation efforts. Encourage everyone to adopt water-saving habits and be mindful of their water usage.

  2. Conduct Regular Maintenance: Regularly inspect and maintain your home’s plumbing system, fixing any leaks promptly to prevent water waste.

  3. Monitor Your Water Consumption: Keep track of your monthly water bills to identify any sudden or unusual increases in usage, which could indicate leaks or inefficient water practices.

  4. Consider Greywater Recycling: Explore the possibility of installing a greywater recycling system to reuse water from sinks, showers, and washing machines for non-potable purposes like outdoor irrigation.

By implementing these water conservation strategies, you can significantly reduce your water footprint and contribute to a more sustainable future. Remember, every drop counts, and small changes in your daily habits can have a substantial impact on water conservation efforts.

Read Also: The Ultimate Guide to Upcycled Crafts for Adults: Unleash Your Creativity and Sustainability

Reducing your water footprint at home is not only an environmentally responsible choice but also a cost-effective one. By adopting water-saving practices, you can lower your utility bills while protecting our planet’s precious water resources. Start small and gradually incorporate these strategies into your daily routine. Every effort counts, and together, we can make a meaningful difference in preserving this vital resource for generations to come.

Categories: Uncategorized

Unlock the Secrets to a Lush, Water-Wise Garden: Ways to Conserve Water in the Garden

No Comments

In an era where water conservation is paramount, gardeners must embrace innovative strategies to nurture their green havens while minimizing their ecological footprint. From eco-friendly cleaning products to upcycled crafts, sustainability has become a way of life, and our gardens are no exception. Embracing ways to conserve water in the garden not only benefits the environment but also promotes a healthier, more resilient outdoor space. In this comprehensive guide, we’ll explore practical techniques, innovative technologies, and mindful practices that empower you to maintain a flourishing garden while minimizing water wastage.

As we navigate the challenges of climate change and dwindling water resources, it’s crucial to adopt a proactive approach to water conservation in our gardens. By implementing ways to conserve water in the garden, we not only contribute to environmental preservation but also cultivate a more sustainable and cost-effective gardening experience. From composting food scraps to zero-waste grocery shopping, embracing eco-friendly practices has become a necessity, and our gardens are the perfect canvas to showcase our commitment to sustainability.

Read Also: The Greener Wanderer’s Guide: Embracing Sustainable Adventures Worldwide

One of the most effective ways to conserve water in the garden is to choose plants that are native to your region or have low water requirements. These plants are naturally adapted to the local climate and soil conditions, reducing the need for excessive watering. Additionally, grouping plants with similar water needs together in designated hydrozones can further optimize water usage. By implementing these strategies, you not only conserve precious water resources but also create a more resilient and low-maintenance garden ecosystem.

Mulching is another invaluable technique for retaining soil moisture and minimizing water evaporation. A layer of organic mulch, such as wood chips, leaves, or bark, insulates the soil and prevents water from rapidly escaping. Not only does this reduce the frequency of watering, but it also suppresses weed growth, reducing the need for herbicides and manual labor. Incorporating mulch into your gardening routine is a simple yet highly effective way to conserve water while promoting a healthier, more sustainable garden environment.

Read Also: The Best Zero Waste Grocery Stores Near You: A Comprehensive Guide and Comparison

Efficient irrigation systems are game-changers when it comes to ways to conserve water in the garden. Conventional sprinklers and hoses can be wasteful, as a significant amount of water is lost to evaporation and runoff. By transitioning to drip irrigation or soaker hoses, you can deliver water directly to the root zones of your plants, minimizing waste and ensuring optimal hydration. Many modern irrigation systems even incorporate smart controllers that adjust watering schedules based on weather conditions, further enhancing water conservation efforts.

Comparison Table: Irrigation System Efficiency

Irrigation System Water Efficiency Cost Maintenance
Sprinklers Low Low Moderate
Hose and Nozzle Moderate Low High
Drip Irrigation High Moderate Low
Soaker Hoses High Low Low

Capturing and utilizing rainwater is another excellent way to conserve water in the garden. By installing rain barrels or cisterns, you can collect and store rainwater for later use, reducing your reliance on municipal water sources. This not only contributes to water conservation efforts but also helps to mitigate stormwater runoff, preventing potential flooding and erosion issues in your community.

Read Also: The Best Eco-Friendly Cleaning Products for Sensitive Skin: A Comprehensive Guide

In addition to implementing water-saving techniques, it’s crucial to monitor your garden’s water usage regularly. Investing in a water meter or flow sensor can help you track your water consumption and identify areas where improvements can be made. By being mindful of your water usage and making adjustments as needed, you can ensure that your garden remains lush and vibrant while minimizing its environmental impact.

Soil health plays a vital role in water conservation efforts. Well-maintained, nutrient-rich soil has a higher water-holding capacity, reducing the need for frequent watering. Incorporate organic matter, such as compost or aged manure, to improve soil structure and enhance its ability to retain moisture. Additionally, consider implementing no-dig gardening techniques, which minimize soil disturbance and preserve the delicate ecosystem of beneficial microorganisms that contribute to healthy soil.

Read Also: Unleashing Nature’s Magic: The Incredible Benefits of Composting Food Scraps and Reducing Waste

Embracing sustainable gardening practices goes beyond water conservation alone. Consider incorporating permaculture principles, which emphasize creating self-sustaining ecosystems that mimic the patterns found in nature. By designing your garden with diversity, resilience, and interconnectedness in mind, you can establish a harmonious balance that reduces the need for excessive water, fertilizers, and pesticides.

As you embark on your water conservation journey, remember that every drop counts. Involve your family and friends in implementing these ways to conserve water in the garden, fostering a sense of collective responsibility and environmental stewardship. Share your successes and challenges with your community, inspiring others to adopt water-wise gardening practices and contributing to a more sustainable future for all.

Read Also: The Ultimate Guide to Upcycled Crafts for Adults: Unleash Your Creativity and Sustainability

In conclusion, embracing ways to conserve water in the garden is not only an environmental imperative but also an opportunity to cultivate a more resilient and sustainable outdoor space. By implementing water-saving techniques, efficient irrigation systems, rainwater harvesting, and soil health practices, you can maintain a lush and vibrant garden while minimizing your ecological footprint. Remember, every drop counts, and by working together, we can create a greener, more water-wise future for generations to come. Embark on this journey today and unlock the secrets to a thriving, water-conscious garden that harmonizes with nature’s delicate balance.

Categories: Uncategorized